
- Twilight Princess Stamp Locations - October 11, 2023
- Tears of the Kingdom Korok Seeds Guide - August 30, 2023
- Tears of the Kingdom Best Recipes - July 19, 2023
Zelda games have always been excellent at dealing with extremes: Tentative steps from the isolated ad protective bubble of Kokoriko Villiage into the huge planes of Hyrule Fields in Ocarina of Time; the juxtaposition between Hyrule and Lorule in A Link to the Past; the contrast between the cutesy world of Koholint Island to the surreal mental prison that formed the reality of all the islanders saw before them.
And Tears of the Kingdom is no different, with stark contrasts between themes, environments, and characters found liberally throughout. In both the latest title and Breath of the Wild, Rito Villiage has always been a particularly important area on the map.
Affixed snuggly to the surrounding rockface, this little village stands strong in the face of the all-consuming evil that threatens the land. As we learned in the first game, the people of Rito village are a hardy bunch — and their situation in Tears of the Kingdom is more emblematic of that fierce resistance than ever.
In this Tears of the Kingdom Rito Village guide, I’ll walk you through all you need to know about the settlement: the trials and tribulations of its inhabitants, how to reach the place, the associated quests, and its many amenities as a functioning village.

Bottom Line Up Front
If you’re in a rush, here are the key aspects you need to know about Rito Village:
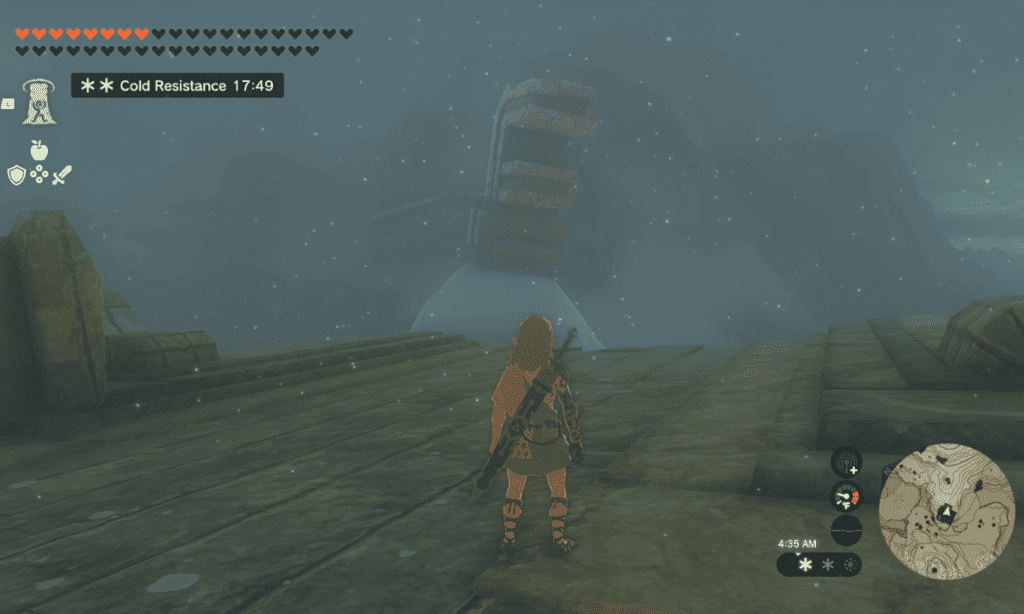
- Rito Villiage is a recurring settlement that spirals upwards around a large vertical rock piece with a horizontal walkway at the summit.
- Originally featured in Breath of the Wild, the village has been engulfed by a furious blizzard at the time of Tears of the Kingdom.
- It is located north of the Tabintha Frontier towards the Hebra region, and the player must traverse a large chasm by the entrance to pass through.
- With the main quest taking you there and with plenty of side quests to explore, the village is a central location you’ll return to many times.
Be sure to also check out the Frequently Asked Questions section at the bottom of the article for some extra bits of information not covered in the guide below.
Reaching Rito Villiage
Preparing
Before embarking on the journey, seek out some Hylian Pinecones. Why you’ll need these will become apparent shortly, but you can easily find them on the trees in Hyrule Field or Lookout Landing.

Next, you’re going to need some protective clothing to brave the freezing weather of Rito Villiage. This sort of clothing is going to be essential as you traverse Hyrule, so it’s better to get it now rather than later.
There are several pieces of cold-resistant clothing you can obtain in Tears of the Kingdom, but the easiest place to get hold of some is on Sky Island.
If you head to Gutanbac Shrine you’ll find a large, dead tree near the exit (you can’t miss it). If you investigate, there’s a hollowed-out alcove with a chest, and inside, you’ll find the Archaic Warm Greaves. These trousers offer two defense and one cold resistance, which is enough to keep you covered for your entry and exploration of Rito Villiage.


If you’d like some extra reassurance, you can also prepare some simple cold-resistant meals to keep you going. The easiest choice would be to cook some Spicy Peppers in a pot; a dish consisting of five of these offers over ten minutes of protection, and the peppers can be found in abundance on Sky Island.
The Journey
You’ll naturally be led to the village by participating in the Regional Phenomena main questline. This quest tasks you with traveling across Hyrule to aid four separate races.
Having headed to Lookout Landing, spoken to Purah, completed the Finding Captain Hoz quest, and obtained the Paraglider, Purah will then divulge key information about what’s been happening in Hyrule. Thankfully, she’ll mark four regions for you to go and investigate, each equidistant from your current location in Central Hyrule. Rito Villiage is on the upper left and can be seen on the normal map view below.

Given the open-ended nature of Tears of the Kingdom’s Hyrule, there are multiple ways of reaching Rito Villiage, depending on which direction you’re starting in. The quickest way, though, is going to be to head straight there first from Central Hyrule to tackle the quests involved first.
What I’d advise is to first make your way to New Serenne Stable to set the marker on your map as a fast-travel location.
This is a great stop-off point as it is roughly halfway between Rito Villiage and Lookout Landing; you can easily get here by heading west from Lookout Landing, crossing the small bridge over the river, and continuing in the same direction.

From here, head right along the left lateral embankment of Hyrule Ridge, and follow it around until you reach Tabantha Great Bridge and cross over to Tabantha Frontier. Follow along the directed path through the Tabantha Frontier, cross Kolami Bridge, and you’ll eventually come to Lake Totori — the body of water that surrounds Rito Village.

Here you’ll discover the main obstacle to reaching the village: a broken bridge. There are several solutions here. When the game launched, many players decided that the best way was to construct a new bridge out of planks, but by far the best method now is to use a Hylian Pinecone.
The Hylian Pinecone is found in plentiful amounts over Hyrule. Because they contain oil, they burn ferociously when under a flame, and the violence of the fire causes large gusts of wind that Link can use in conjunction with his paraglider to get across the bridge.
To the right of the broken bridge, you’ll notice a Hylian standing next to a campfire. All you need to do to get across the gap is to throw one of your Hylian Pinecones into the fire, which will create an updraft. Then, jump in and open up your glider. You’ll sore high into the air with enough height to safely cross the chasm.
From here, the route to Rito Villiage is nice and straightforward. All the remaining bridges are intact, so simply keep progressing forwards until you reach your destination.
Tulin of Rito Village: The Main Quest
So, you’ve arrived at Rito Villiage, and once you’ve explored a little and have made your way to the peak of this rather precariously structured town, you quickly learn of a commotion. This event triggers the first event of the quest.
A young child named Tulin [who is actually the son of Rito — a recurring ally in Breath of the Wild], is seen flying off into the distance, asserting that he can help the environmental situation that plagues the village [a perpetual winter that has engulfed the town with an unknown cause]. Naturally, our first job is to head off and find him.
He’s headed in the direction of Hebra — and it’s a good thing you sourced and packed those cold-resistant clothes!
You’ll have a new waypoint on your map following Tulin’s abrupt disappearance for Hebra Trailhead Lodge, and I recommend not taking a detour here.
You’re in the perfect place to get a great head start with your paraglider, so jump off the projecting piece of rock in front of you, glide until you reach the next rock face, and continue through to your destination. Thankfully, you won’t find many enemies here — only that the journey is a bit of a slog without your horse.
Once there, you’ll want to have a word with Harth. He’ll inform you that he saw Tulin and directs you further to a cave ahead.

Your next pilgrimage involves another trek up a snow hill and the odd fight with an Ice Keese here and there, but before long, you’ll reach the mouth of the cave that Harth was talking about. This is Talonto Peak Cave, and your next task involves some puzzle-solving.
The Talonto Peak Cave Puzzle
The puzzle here is a simple one. Upon entering the cave, you’ll come to find you need to cross an icy body of water, and handily, at the cave entrance are some square sheets of wood you can knit together to make a bridge. Carry each one in and attach them using your Ultrahand and Fuse ability.

Having successfully crossed to the other side, head to the rockface on the left and climb up to the next ledge rather than pressing forward. Quickly dispatch the enemy ahead, and then, positioning the cursor on the utmost portion of the cave ceiling above, use your Ascend ability to travel through the cave and onto the surface.
This will bring you out onto the mountain face, making it easier to clamber up the side towards the beige building above you. Use this structure to proceed further up the mountain once you reach it by once again using your Ascend ability.

Now, the next portion will require some old-school Breath of the Wild style clambering. Once you’re stood on top of this beige structure, climb up the rockface that it is attached to, and once you can stand again, you’ll find Tulin glumly looking out over the mountaintop peninsula.
Tulin’s Plight and Trampolines
Another cutscene will play here as Link finds Tulin distressed at a winged beast stealing his bow, and it’s your job to defeat the monster and get it back.
You’ll also be informed of your ability to use Tulin’s special power; the young Rito will now join you throughout the rest of the quest, and by pressing A when near him, you can have him create a strong gust of wind in any direction to use for propelling your glider.
Use this technique to reach the next map marker where you’ll have a clean shot at the bird: you need to use only one arrow to take it down for good.
Having got Tulin’s bow back, the pair must now travel to the Sky Islands above Hebra Peak, where Tulin reportedly saw Princess Zelda.
What follows is a platforming sequence that makes liberal use of both Tulin’s ability and Ascend. Your path is marked by several of the beige ancient stone structures which protrude from the mountains we utilized earlier. The first one is located close to the platform you stand on, and after that, you can easily see which to jump to next.
Having reached several of these platforms, you’ll eventually come across a Rito named Huck, who deduces that Link and Tulin may be the only beings capable of traversing the clouds above the final platform and discovering the cause of the blizzard.
Head forward towards this final structure in the same manner you have previously. Once you reach the platform underneath the elongated structure that disappears into the sky, you’ll reach a new area called Rising Island Chain.

Link and Tulin are then directed to a boat whose sail can be used as a trampoline to propel you into the air, and another sequence of linear platforming (and several more always satisfying trampolines!) before reaching a final updraft which will take you swiftly to the Wind Temple.
The Wind Temple
The Wind Temple isn’t nearly as difficult as previous iterations bearing the same name. The objective is to release five turbine locks that secure a hatch on the deck of the temple [which, if you hadn’t noticed, is in the form of a large ship].
Each is marked clearly on the map and will usually require you to repair a crank system to open a gate using Ultrahand and Fuse.
Once the gate is open, you must use Tulin’s wind ability to restart the machine. The mechanism for opening the gate to each turbine area is slightly different, but you simply need to find the nearby parts for each crank and stick them back together [note that there will be a couple of minor enemies to inconvenience your task]. Here’s a quick breakdown:

- Turbine 1: The first turbine is nice and simple. Head to the location indicated on the map, and you’ll see a switch, a glowing handle, and a locked gate. All you need to do is reattach the handle to the switch with your ultra hand to open the gate, and then head into the now unlocked room and use Tulin’s ability on the turbine [using Tulin’s ability is required on all turbines, so I won’t mention it from now on].

- Turbine 2: Maintain a position somewhere relatively high, and glide through into the room indicated on the map above for turbine 2. Hop over the ice chasm with your glider, and then use Ascend to sore up through the ceiling and onto the next floor. In this new room, you’ll find a broken propellor system with its fins on the floor: attach two fins to the mechanism, and use Tulin’s ability to unlock a room with a ladder to ascend on the right. Once you reach the top, you’ll find the second turbine.

- Turbine 3: Proceed to the lower level of the ship where the entrance for Turbine 3 is located. Deal with the inconvenience of one minor enemy, and the turbine is yours to activate [no switch to repair this time].

- Turbine 4: Firstly, glide up to the smallest part of the ship indicated by the golden square on your map using the large spiraling updraft in the center of the ship. This graphic represents a hatch you need to open with your Ultrahand. Then, drop down below, taking care to avoid the red lasers. Then, locate the long wrench on the floor which is detached from the large leaver at the posterior section of the room, reattach it using Ultrahand, and enter the now open gate.

- Turbine 5: You’ll notice that the fifth and final turbine entrance is located behind a wall of icicles, which you can easily smash through with your weapons. Proceed through to find a rotating structure that you’ll need to use your Recall ability to reverse and pass through. In the next room, you’ll find one enemy to deal with, and the final turbine mechanism which requires you to shoot an icicle from the ceiling, and insert it into the middle to complete the set of gears. Doing so will grant access to the turbine.

Having unlocked all segments, head back to 1F and traverse the green portal in the center of the deck to reach the boss.
Fighting Colgera
Defeating Colgera is relatively straightforward. This is a centipede-style boss that you’ll fight from the air. Floating over the top of the creature will cause it to furiously fire rocks at you from its back, and while it does this, it’s vulnerable to your attacks.
While dodging the rocks, disengage your glider and dive straight down onto the glowing ice glacier of its back, crashing straight through it and inflicting considerable damage.

Colgera will quickly follow with a rushing attack upwards, which can be avoided by quickly deploying Tulin’s ability in any direction to dodge out of the way.
The creature has four segments to deal with in total, and after smashing through two of them using the method above, you’ll trigger the second phase of the boss fight where they use a new tornado attack.
Your objective here remains the same [taking out the remaining two spots on its back], but you’ll need to take care to avoid these new attacks. You will notice that during the tornado attack, one of the tornados will be slightly shorter than the rest: use your glider to pass over the smallest one, avoiding the attack.

Having performed the back attack four times, you’ll defeat the boss and can continue to the final story segment showcasing the weather returning to normal in Rito Villiage.
Side Quests
Genili’s Home Cooking
To engage with this side quest, head to The Slippery Falcon general store. Here, you’ll find the Green-feathered Rito, Genli.
She enjoys cooking, and upon your arrival is hoping to make a Staminoka Bass pie, but cannot leave the village due to the blizzard to get hold of the fish herself. Your task is to obtain the fish yourself so that she can finish the recipe.
Staminoka Bass can easily be caught in the small ponds at the bridges you crossed to get to Rito Villiage, so you don’t have to go far.
You will, however, have to wait until you’ve completed the main quest and rid Rito Villiage of its perpetual winter. Once the village has thawed, head to the aforementioned location to find the fish there and bring them back to Genli. He’ll give you Biting Simmered Fruit in return which restores a couple of hearts of health.
Molli the Fletcher’s Quest

Molli’s quest is a fairly straightforward one. You’ll find her at the top sections of Rito Villiage, where she explains to Link that she’s in search of some Ice Fruit. Apparently, her dad told her that Ice Fruit has the powerful ability to freeze monsters, and so she’s working on an invention to try and apply this knowledge.
Link can either find and offer her an Ice Fruit [found in the Hebra Mountains] or alternatively, he can give her White ChuChu Jelly which does the same job.
Getting the White ChuChu Jelly either requires finding and defeating a White ChuChu, or freezing a different colored ChuChu and defeating it which turns it white. Having provided Molli with what she needs, she’ll offer a reward of ten arrows.
Legacy of the Rito
Having completed the Wind Temple, the Legacy of the Rito side quest will become available to you upon returning to Rito Village. Talk to Teba, and he’ll tell you about a new bow he’s building: he needs a Swallow Bow, three Diamonds, and five bundles of wood.
As you’ll likely know by now, wood bundles can be obtained easily by chopping down trees, but for the bow, travel to Hebra Peak and go southeast from this location to find two large ice blocks [the coordinates are 2635, 2710, 0508]. Melt the ice to reveal a chest in one of the blocks where you’ll find the Swallow Bow.
For the Diamonds, you’re going to have to cough up the cash: they can be purchased for 1000 rupees each from Goron City’s markets. Alternatively, you occasionally get Diamonds as a reward for completing shrines or from shimmering ore deposits [although the latter is rare].
Even if you do pay for the diamonds, it’s worth it. Returning to Tulin and offering him the items gets you the Great Eagle Bow — one of the best bows in the game.
Treasure of the Secret Springs

Lastly, we have Treasure of the Secret Springs, which is started by talking to Tulin after you’ve finished the main quest: Tulin of Rito Villiage. The quest requires that you solve a riddle as follows: “Guide the three waters to that place. When it fills, the slumbering treasure will awaken once more.“
It’s more fun to figure this out on your own, but I will say you’ll need to search the Hebra mountains and make sure you have some way of making fire on your person. Once you solve the riddle, a special helmet called the Vah Medoh Divine Helm will be yours — a call back to the Divine Beast which circled Rito Villiage in Breath of the Wild.
Amenities

As is the case with most of the larger settlements, Rito Villiage has a healthy economy of local businesses to explore. Most of these you’ll remember from Breath of the Wild, although they have changed subtly due to the huge shift in circumstances the villagers have faced since the first game.
The Slippery Falcon
The Slippery Falcom is the general store of Rito Villiage. Fans of Breath of the Wild will remember that Misa ran the shop in that game, but having taken on other duties following the blizzard problem, Cree has taken the reigns when you first set foot in the Village. Once the weather clears, Misa once again returns to the shop.
The store sells several items, though notably less than Breath of the Wild because of a struggle to bring products into the settlement. Four items can be purchased there: Arrows, an Oil Jar, Goat Butter, and Cane Sugar — the latter two products of which cannot be found anywhere else.
Brazen Beak
Brazen Beak is an armor shop that is usually run by Nekk. Kheel runs the store while Nekk is away during the blizzard.
The store sells the highly valuable Snowquill Set which when worn will offer Link excellent protection against Hyrule’s coldest regions.
In fact, this is the only thing the shop sells, with the armor being sold in three individual parts: the Snowquill Headdress, Snowquill Tunic, and Snowquill Trousers. Collectively, this set will set you back 1150 Rupees. This is the exact same outfit the store sold in Breath of the Wild; it costs the same for the collection, but the prices for each item are slightly different for some reason.
Swallow’s Roost
Swallow’s Roost is the only Inn within Rito Island, and it is manned by Knotts while Cecilli is away during the blizzard [although Knotts stays put to make the beds even when Cecilli returns].
There are two rest options to choose from at the inn: the standard bed option for 20 Rupees which will restore Link’s Health and Stamina stats, and the Rito-down bed at 50 Rupees, which will also provide Link three temporary hearts and a temporary stamina meter.
FAQs
Question: Will Rito Villiage appear in any other future Zelda titles?
Answer: So far, Rito Villiage has only appeared in Breath of the Wild and Tears of the Kingdom, and whether or not this area will appear in another game depends on where Nintendo plans to set the next entry. If the future game is set in the same version of Hyrule as the most recent two titles, we can expect to see Rito Villiage again.
Question: Will more content be added to Rito Villiage?
Answer: We don’t know what any future DLC will bring quite yet, but if Breath of the Wild’s extra content was anything to go by, future content will most likely enrich areas that already exist with new quests and fresh activities to explore. Given the significance of Rito Villiage as a central location in Tears of the Kingdom, I think there’s a good chance we’ll see some extra content for this area. Nevertheless, we’ll just have to wait and see!
Question: Does the Rito exist in any other games before Tears of the Kingdom and Breath of the Wild?
Answer: Yes! In fact, the Rito race was first seen in The Legend of Zelda: Windwaker. There, their home was Dragon Roost Island — a similar town to Rito Island in that it was structured around a tall central spire which is actually a volcano. Here we find one of the game’s main characters, Medli: a young Rito who accompanies Link on more than one occasion throughout his journey across the sea.
Conclusion
I hope you enjoyed this guide on one of the Tears of the Kingdom’s most important settlements. For more, be sure to check out our other Tears of the Kingdom guides, such as our Best Weapons Guide or Stable Guide.
Also, I highly recommend keeping up to date with the Tears of the Kingdom board on Reddit; people there are always coming up with new and inventive ways to complete each quest, including those in Rito Villiage. Experiment and see what you can come up with yourself, and above all, have fun!