
- Twilight Princess Stamp Locations - October 11, 2023
- Tears of the Kingdom Korok Seeds Guide - August 30, 2023
- Tears of the Kingdom Best Recipes - July 19, 2023
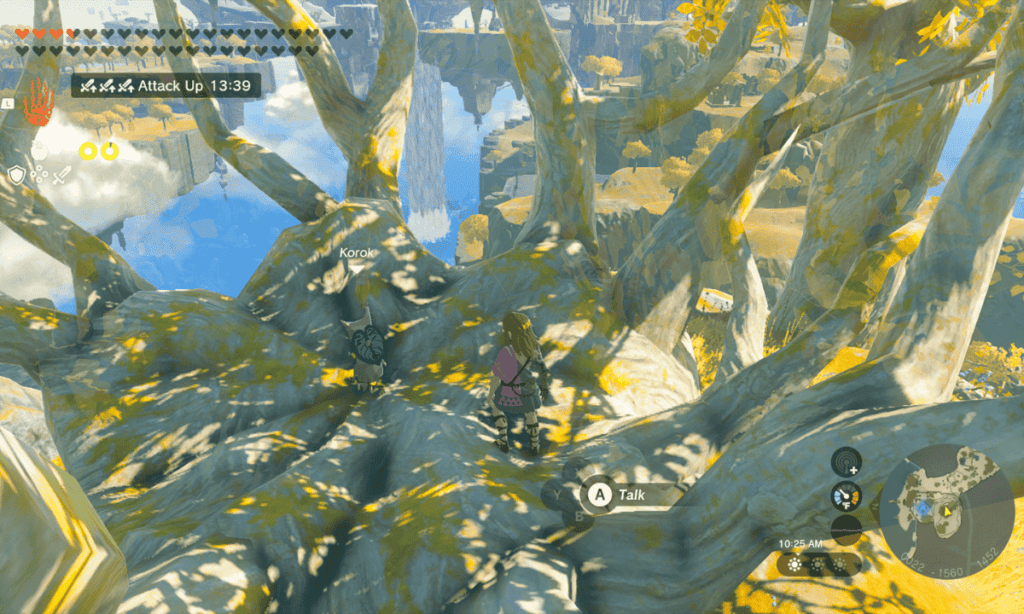
The Korok race has been a staple of the series for many years now, and I’d wager fans are mostly pleased about their inclusion as light-hearted characters that provide some of the less complex and more chill side tasks the games have to offer.
We’ve experienced these twice before in both The Wind Waker and Breath of the Wild, and Koroks—and therefore Korok Seeds—are back in all their glory for Tears of the Kingdom.
Once again, obtaining Korok Seeds requires you to go hunting around the vast planes of Hyrule for the benefit of upgrades, but what do these upgrades do? How many Korok Seeds are there? How difficult are they to find? And what is a Korok, anyway?
In this Tears of the Kingdom Korok Seeds guide, I’ll be delving into all these questions and more so that you can head into Hyrule safe in the knowledge that you at least understand the mammoth task ahead of you. To get you started, I’ll also show you how to find each of the 19 available Korok Seeds in the starting area of Great Sky Island.

Bottom Line Up Front
If you’re in a rush, here are the key takeaways:
- Koroks are a species of small wooden people who are tasked with protecting The Great Duku Tree and the forests as a whole.
- In Tears of the Kingdom, they are hidden all over Hyrule for Link to find and reap the rewards.
- These rewards come in the form of Korok Seeds, which Link can use to upgrade the slots in his inventory.
- There are a total of 1000 Korok Seeds across 800 separate locations to find, and obtaining each of them requires the player to complete a small puzzle of some kind.
- There are 19 Korok Seeds to find in Great Sky Island, and with each being pretty easy to locate, this is where I’d start your hunt.
How to Use Korok Seeds
To start with, let’s take a look at how to use these things.
Even after you’ve amassed a decent number of seeds, you won’t be able to use them right away. Instead, you must visit an especially large Korok called Hestu: a merchant of sorts who enables Link to exchange his Korok Seeds for upgrades to his inventory. The story goes that Hestu needs the seeds to fill his maracas.

You’ll first locate him after triggering a side quest called Hestu’s Concerns. Head to the marker on the map below to trigger the quest.
You’ll find him in great distress as he gets tormented by a couple of malevolent trees known as Evermeans, and you must defeat these first before speaking with him (you’ll either need to set them on fire or use a chopping weapon [such as an axe] to cut them down).
Having completed this task and returned to a much less frightened Hestu, you will have now unlocked inventory expansion and can start spending your Korok Seeds.

If you have an adequate amount of Korok Seeds at the time, he can make upgrades to your inventory there and then.
Before upgrading, you’ll start out with 10 slots for weapons, 4 shield slots, and 5 bow and arrow slots. What you decide to prioritize upgrading will be down to your playstyle, and this is why I recommend experiencing the game organically for a few hours before attempting to upgrade; figure out how you like to play and what weapons and utilities you enjoy using most, and then tailor your Korok seed upgrade paths to that.
Unfortunately, the number of Korok Seeds you’ll need to offer Hetsu to keep expanding increases exponentially. Take a look at the table below to see the incremental changes you’ll experience. You need about 450 seeds in total to max out the inventory.
| Expansion Level | Melee Weapon Inventory Cost | Bow Inventory Cost | Shield Inventory Cost |
| Expansion 1 | 1 Seed | 1 Seed | 1 Seed |
| Expansion 2 | 2 Seeds | 2 Seeds | 2 Seeds |
| Expansion 3 | 3 Seeds | 3 Seeds | 3 Seeds |
| Expansion 4 | 5 Seeds | 5 Seeds | 4 Seeds |
| Expansion 5 | 8 Seeds | 8 Seeds | 5 Seeds |
| Expansion 6 | 11 Seeds | 12 Seeds | 10 Seeds |
| Expansion 7 | 17 Seeds | 17 Seeds | 10 Seeds |
| Expansion 8 | 25 Seeds | 25 Seeds | 10 Seeds |
| Expansion 9 | 35 Seeds | 10 Seeds | |
| Expansion 10 | 45 Seeds | 10 Seeds | |
| Expansion 11 | 55 Seeds | 15 Seeds | |
| Expansion 12 | 15 Seeds | ||
| Expansion 13 | 15 Seeds | ||
| Expansion 14 | 15 Seeds | ||
| Expansion 15 | 15 Seeds | ||
| Expansion 16 | 20 Seeds | ||
| Maximum Expansion | 207 Seeds | 73 Seeds | 160 Seeds |
The main thing to know about Hestu, though, is that he doesn’t stay in one place and moves about between three separate locations. You can only make two upgrades the first time you meet him at Lindor’s Brow before he dashes off.
He’ll next travel to Lookout Landing, and being so large, you can’t miss him upon entering the town area (though bear in mind he does move about within it).
Once he’s here, you can be safe in the knowledge that he won’t move until you’ve unlocked Korok Forest, which will be his third and final visiting site. He’ll reside here in the middle of the forest, and again, you can’t really miss him.
Where to Find the 19 Korok Seeds of Great Sky Island
With all that said, let’s begin the hunt! Head back to Great Sky Island and then take a look at the map below to see each Seed at a glance. Number 1 through 19 is ordered in a way so that the next seed is always most easily accessible.

Korok Seed 1
For your first seed on Great Sky Island, head to the location below to locate a group of leaves weaving in and out of some stone ruins. Thankfully they move pretty slowly, so track them down and hit A to examine them. A Korok will then appear to give you your seed.


Korok Seed 2
Your next seed can be found by accessing the tiny island indicated below. Once you reach it, you’ll notice a rock sits on top of it. Use Ultra Hand to lift it, and the Korok Seed is yours.


Korok Seed 3 & 4
These 2 seeds involve a Korok transport puzzle. Once you reach the point on the map I’ve indicated with a star stamp, you’ll find a Korok stuck on top of a rock.
To gain seeds 3 and 4, you’re required to deliver the Korok to his friend across another island by building him a rail cart to traverse the gap. Nearby, you’ll spot a couple of logs and some metal brackets: Use Ultrahand to glue the two pieces of wood together to make a platform, and then fix the two metal hooks to it.
Pick the Korok up with Ultra Hand, plop him onto the platform, and then lift up the entire structure and attach it to the rail above you. Hop onto the platform yourself and the cart will carry you and the Korok to his friend, where you can then drop him off to claim two seeds for your troubles.


Korok Seed 5
You’ll find Seed 5 close by to the In-Isa Shrine. Climb the rock face to the left of the Shrine entrance and follow a set of large, protruding roots to reach a large twisted tree.
Climb the tree to find a platform with a rock, under which there will be a Korok with a seed to give you.


Korok Seed 6
Getting this seed is a little more involved than most, and you’ll want to make sure you bring some Fire Fruit with you.
You can see the location on the map below, but rather than trying to head straight there, head for the small pond indicated by my current location.
There, you’ll find a group of movable platforms that you can use Ultrahand to move about. You can use them to make a set of stairs allowing you to get up the ordinarily treacherous rock face with ease.
Once at the top, you’ll find a large tree stump you need to climb to the top of. From here you’ll find the centre has been hollowed and that there are some leaves at the bottom. Throw a piece of Fire Fruit on top of the leaves to burn them, lift the rock beneath, and you’ll earn yourself a Korok Seed.


Korok Seed 7
The next seed is located in the Room of Awakening, and to get back here, you’ll need to have completed all Shrines in the Temple of Time.
Having fast-travelled back, do a 180-degree turn and head into the room with the tree hollow to find a bundle of floating leaves and your next Korok Seed.


Korok Seed 8
Korok Seed 8 is also located around this area, but not within the Room of Awakening itself. Start by heading to the outside entrance of Nachoya Shrine. From here, climb the rockface to the right that’s covered in large roots, and carry on ascending until you see a large tree stump.
Climb the stump to find its core filled with water with a lily pad floating in the center. Simply climb on top of the lily pad and examine it to get the seed.


Korok Seed 9
From the entrance of the Nachoya Shrine, follow the metal rails of the platform you stand on to reach the broken edge. Glide off the edge and towards the marker on the map below, and as you hover above the pond you see in the screenshot, you’ll see a ring of lily pads.
To earn your Korok Seed, you must release your glider and dive faultlessly into the center.


Korok Seed 10
Return once again to the ledge close to the Nachoya Shrine, and this time, you’re looking to land on a small piece of land almost directly below where you stand at the edge.
Once you’ve glided down and reached this area, you’ll find a small ring of rocks encircling a tree: Use Ultrahand to pop the missing rock back where it needs to be to complete the ring and get the seed.


Korok Seed 11
Your next Seed is very close by on the indicated circular island. Having dropped directly down towards the edge, you’ll find a small pit of breakable rocks with a singular rock nearby. Use Fuse to glue this rock your your weapon and smash it against the rock pit to create an entrance to a new area below.
Down here, you’ll see a floating balloon towards the left edge. Shoot it down to claim your Korok Seed.


Korok Seed 12
Obtaining Seed 12 requires you to traverse a snowy bridge and complete a small physics puzzle. Once you reach the location, you’ll find a cube: All you need to do is use Ultrahand to rotate the separated segment to make a regular shape like in the image below. A Korok will then spring into existence and give you a Seed.


Korok Seed 13 & 14
Korok Seed 13 and 14 involve another Korok delivery mission: Head to my location to find a struggling Korok, a set of rails, and a stray mine cart at the center of the island.
Use Ultrahand to drop the Korok into the mine cart and then attach a fan to the back of the vehicle. If you don’t have any on you at the time, you can head over to the dispenser on the same island and insert some Zonai charges to make one.
Having fit the fan, swipe at it to get it going and ride the cart to the other side to deliver the Korok and grab two seeds.


Korok Seed 15
Fast travel to Gutanbac Shrine and you’ll immediately spot a large, irregularly shaped tree trunk close by. You’ll also see a wooden platform protruding from it that you can use Ascend on to reach the base.
Rather than heading through its arched center, clamber up to the top to find a hollow and a ring of rocks, where placing the missing rock back within the ring will give you a seed.


Korok Seed 16
Head to the snowy area indicated and climb to the top of a small mound which represents the tallest point in the area. Once you reach the top, you’ll spot a dandelion: Swipe at it and then catch the seed before it hits the ground to claim your reward.


Korok Seed 17
For seed 17, head to the location below but then jump down and glide to the secret area directly underneath. You’ll notice another Ultrahand puzzle that involves a rectangular wall with a missing piece lying on the ground. Insert the +-shaped piece with the right orientation to grab the Korok Seed.


Korok Seed 18
The penultimate seed is located within a ruined stone maze in the center of Great Sky Island. User your glider to get here from the Seed 17 location, and once you arrive, I suggest climbing on top of one of the stone pillars to survey the area until you notice a large tree enclosed by a square wall.
Head through into this area to find a yellow flower, walk up to it to see it disappear, and keep following it as it moves about the area. Eventually, it bursts into a Korok.


Korok Seed 19
For the final seed on Great Sky Island, you’ll need to head to the Temple of Time and proceed underneath it to where the water runs. Towards the back of the underside of the Temple, you’ll notice a tree stump fixed to the upper part of one of the broken pillars.
Hop over onto the platform directly below it, and then use ascend to pass up and through it. Having exited to the surface, you’ll be given the seed.


Other Korok Seed Puzzles
You’ve now seen a few of the common puzzle types the game throws at you when hunting for Korok Seeds. Here are the other ones you should look out for as you explore Hyrule!
- Something’s not quite right here…
Look for objects that seem out of place or in places they shouldn’t be (such as plants or rocks). Approach the mysteriously behaving object and press A — it will very likely reveal a Korok.
- Catch the Ring
If you see a tree stump with some leaves painted on it, step onto it and you’ll trigger a time trial of sorts that requires you to chase down a floating ring. Catch up to the ring to reveal a Korok.
- Archery Challenges
Archery challenges are denoted by a wooden board with a painted target. Examine the board to start the game and hit all the targets successfully to obtain a Seed.
- Apple Statues
You might have noticed Dsojin-style Japanese statues dotted about Hyrule. They often come in pairs and each hold a bowl — one filled with fruit, the other empty. Fill the empty bowl with the fruit type its sibling holds to grab a Korok Seed.
- Pot on a Chain
If you see a small pot attached to a chain, smash it with a bow and arrow to claim your prize.
- Pull the Plug
Occasionally, you’ll notice a chain and plug oddly attached to the bark of a tree. Manipulate the chain with Ultrahand to pull it and the plug out of the tree to get a Seed.
- Hidden in Plain Sight
Sometimes, you’ll notice a glittery effervescence darting about in circles, and if you manage to catch it, you’ll find that this is actually a hidden Korok.
- Hold the Boulder
If you see a stumpy, three-branched tree with a boulder next to it, lift the stone with Ultrahand and pop it snuggly between the three branches to earn a Seed.
- Ringing the Bell
Within buildings (and these buildings could be anywhere and of any type), you’ll sometimes see a hanging bell. Ring the bell using Ultrahand and a Korok Seed is yours.
Finding the Korok Mask
If you’re having trouble locating Koroks (or you want to make the immense task of finding all of them just a little easier), I recommend getting your hands on the Korok Mask.
This is an item returning from Breath of the Wild that, once worn, will alert you to a Korok’s presence by shaking and making a characteristic rattling sound. The mask won’t solve any of the puzzles for you, of course, but it will make it easy to actually locate them (which is usually the bigger battle).
Caution: Bear in mind that to discuss finding the mask, we’re definitely well within spoiler territory, so proceed at your own risk.

The Korok Mask is located in the Depths and is given to the player as a reward for completing The Forset Colleseum. Specifically, the mask is offered to you in the chest after beating a boss called Black Gloom Hinox.
Beating the Forest Colleseum and the boss is going to be a big challenge if you’re in the early game, but it’s still doable.
To start the challenge, you’ll want to go to Minshi Woods Chasm, which is the nearest location to this part of the Depths and the only way to enter (fast travel to Eckochiu Shrine if you’ve already unlocked it to reach this place faster).

Jump straight into the chasm and follow the Lightroot you’ll spot in the distance if you look northwest. Pursue this beacon, and you will be led directly underneath the Ramobnukas Lightroot where you can ascend to a new area.
Once you’ve teleported, you’ll notice a bunch of mighty bananas a few paces in front of you; this is actually a trail that will lead you straight to the Forest Colleseum, and then it’s up to you to defeat the boss and claim the Korok Mask.
If you’re having trouble beating the Black Gloom Hinox, DannyDragon’s short tutorial will show you the ropes.
So Many Korok Seeds, So Little Time: Some Tips as You Progress

As you can see, there are numerous ways to find Korok Seeds in Tears of the Kingdom. If you want to make finding them a priority, I recommend you don’t rely on fast travel too much, as doing so will mean you’ll miss the vast majority of secret Korok encounters.
Also, don’t bother looking in the Depths: Believe me, I’ve done a good bit of searching in that realm and haven’t seen a single one, and given that I couldn’t find anyone else online that has, we can assume Nintendo hasn’t included them in this location.
I wouldn’t put too much pressure on yourself to find Korok Seeds, either; Nintendo has done such a great job at opening up opportunities organically that you should never have to go searching specifically to find them (unless you’re one of the maniacs like me who’s dead set on finding them all). There are so many to find that you’ll max out your inventory space pretty quickly.
Tears of the Kingdom Korok Seeds Guide: FAQs
Question: Is finding Korok Seeds worth the hassle?
Answer: The answer to this question all depends on your playstyle and how much you value the item slots, but I think it’s clear having those extra slots will be a big help on your journey; weapons break all the time, and it’s important to have as many backups as possible.
I also think searching for the Koroks greatly enriches and fleshes out the often lonely planes of Hyrule, but that’s something you’ll have to decide for yourself.
Question: What’s under the masks?
Answer: This question has been floating around since The Wind Waker, but I think what we think of as a mask is actually just part of the Korok’s body! That’s their face as far as I’m concerned.
Question: Might we get more Korok content with future DLC?
Answer: In the Breath of the Wild DLC, players were offered the Korok Mask as an unlockable reward, so it’s definitely plausible. Given the Korok’s cementation in the franchise, I think it’s likely we may see something Korok-related with future DLC—but only time will tell what that may be.
Wrapping Up
I hope this guide on Korok Seeds was useful to you. If you’re after some more tips for this huge game, don’t forget to check out our other Tears of the Kingdom guides such as the Garden of Time Guide or the Rito Villiage Guide. Thanks for reading Legends of Z!