
- Twilight Princess Stamp Locations - October 11, 2023
- Tears of the Kingdom Korok Seeds Guide - August 30, 2023
- Tears of the Kingdom Best Recipes - July 19, 2023
I think it’s safe to say that Twilight Princess is known most for an aesthetic that was the polar opposite of the cutesy cel-shaded entry before it. A much darker story and more realistic style brought many fans back to the series, but that didn’t mean Nintendo hadn’t learned anything from The Wind Waker.
That game brought proper collectibles to the series for the first time, and when Twilight Princess HD was released on the Wii U, it similarly included some more light-hearted collectible challenges.
Alongside chasing down the horrors of the Twilight Realm, Link could also engage in the decidedly more tame quest of finding 50 decorated rubber stamps.
Hunting down these oddities naturally becomes a particular interest for post-game fans hoping to extend their Twilight Princess experience further; having undertaken the pilgrimage myself, I’ve written this guide to walk you through obtaining each stamp.

Before You Start
Order Is Important
To embark on the task of obtaining all Stamps, it’s important to have completed the majority of the game. If not, you won’t have access to many of the locations listed below, and you also won’t have all the items required to reach each Stamp.
Two of the stamps are located in Hyrule Castle, the penultimate location. Collect all the Stamps you can before you get here, and then enter the dungeon for the final two and complete the game.
You’ll also find that below each stamp’s title is the location, so if you’re currently in one area, scan the list to see if there are any others at the same location to save yourself some time.
The Compass Is Your Best Friend
Unfortunately, Twilight Princess doesn’t provide map coordinates like the newer Zelda games do, which means I’ll have to rely on visual cues and compass directions to guide you to each stamp’s location.
Stamps Don’t Do Anything Anymore
Finally, it’s important to remember that collecting all the Stamps offers only the satisfaction of 100% completion; it used to be the case that you could use the stamps in Mii Verse artwork, but with the service having now been discontinued, they serve no purpose. This is a big task to commit to, so just make sure you know what you’re getting into!
The Locations
Stamps can be grouped into two categories: Hylian alphabet and character drawings. I’ve split the list into these two categories to make things easier to read, starting with the Hylian Alphabet stamps. There are 50 stamps to collect in total but only 49 to find — the 50th ‘True Minda’ stamp is awarded automatically after you’ve found all the others.
Hylian Alphabet Stamps
1. A Stamp
- Location: Forest Temple
Reach the water-sunken room, where you find the boss key, and jump into the body of water beyond where the chest sits to locate a small tunnel. Traverse the tunnel, and you’ll reach a chest containing the A Stamp.

2. B Stamp
- Location: Snowpeak Ruins
Reach the room identifiable by the vast bottomless pit at the westmost point of the map. As you carefully walk the rafters, you’ll come across both a blue and a gold chest. The gold one conceals the B Stamp.

3. C Stamp
- Location: Eldin Province
For this Stamp, you’ll need to head to the very center of the map in Eldin Province. Here, you’ll find a dig spot: head under in your wolf form to locate a hidden room with a few enemies, and light the two torchlights there to reveal a chest in the middle of the room. You’ll find the C stamp within.

4. D Stamp
- Location: Arbiter’s Grounds
For the D Stamp, you’ll want to use the Spinner item to quickly traverse the central room in Arbiter’s Grounds. You will spot the chest containing your prize on the top right of the map, marked by a yellow blip.

5. E Stamp
- Location: Kakariko Gorge
Collecting this stamp requires you to visit the circular area with the owl statue at the center of Kakariko Gorge. The chest containing the E stamp is located on the ridge above, but to reach it, you’ll need to use the Dominion Rod to move the owl statue three times so that you can use it as a platform to stand on and traverse the gaps.

6. F Stamp
- Location: Lanayru Province
With the Zora armor and Iron Boots equipped, dive into the body of water surrounding the submerged north gates of the castle and head towards the gridded cage fixed to the wall. Drop in through the top using the Iron Boots to find a chest containing the F stamp.

7. G Stamp
- Location: City in the Sky
Stamp G requires you to reach the second floor of the City in the Sky Dungeon. Here, you’re tasked with traversing the impassable ruins by using the Hookshot on the floating Peahats above you, swinging from one to the other.
As you reach the point where you’re passing through a large crack in the wall, you’ll notice a deviating Peahat to the right on a separate island; use your Hookshot on the Peahat to reach the island and the chest containing the G Stamp.

8. H Stamp
- Location: Goron Mines
As you traverse Goron Mines, you’ll eventually enter a large, oval-shaped area built up with wooden planks (west on the map). Under this structured walkway is a body of water.
Having dived into the water, you’ll find the chest containing the H Stamp towards the upper right area of your map. Equip the Iron Boots to anchor yourself to the surface, and break through the wooden planks with your sword to get to the chest.

9. I Stamp
- Location: Lanayru Province
Travel to North Hyrule Field, stop once you reach the bridge, and then head eastward. With your sense ability turned on, keep going until you start to near a large rockface; you’ll soon come across a patch of sparkling dirt encircled by a ring of grass. Dig down to reach a hidden pit and a chest containing the I Stamp.

10. J Stamp
- Location: Lake Hylia
Find Stamp J halfway through the Dark Lantern Cavern at Lake Hylia. You’ll find this area southwest of Lanayru Province, and the entrance is blocked by a large rock you’ll need to destroy with a bomb. At the midpoint of this long tunnel, you’ll reach a more open area with two torches. Light them, and a chest will materialize with the J stamp inside it.

11. K Stamp
- Location: Lakebed Temple
For Stamp K, you will once again require the Iron Boots. Within the central chamber of the Lakebed temple, jump into the large body of water and swim down towards the bottom. Once you reach the bottom-most pillar of the central stone column, equip the Iron boots and walk around the perimeter to the Stamp K chest.

12. L Stamp
- Location: Temple of Time
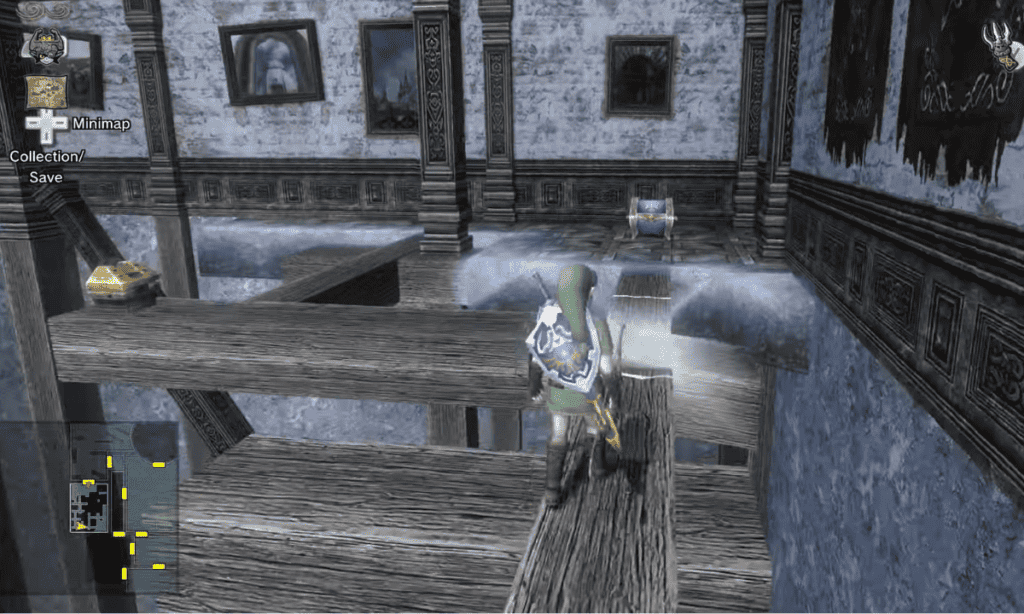
The L Stamp is located on floor 5F within the Temple of Time. Having passed through the central part of the chamber in the south end, simply head straight ahead to the end of the room to find the chest holding the Stamp.

13. M Stamp
- Location: Lanayru Province
Head to the bridge and then directly south until you reach the start of some mountains, which prevent you from going any further. Look up, and you’ll see one of the common honeycomb-patterned attachment points you can use your hookshot on.

Having used the Hookshot to reach the nearby ledge, you’ll immediately spot three more Hookshotable spots; continue platforming until you reach an apparent dead end. At this point, transform into Wolf Link, use your sense ability, and dig underground where the patch of grass is.
In this new underground area, dispose of a dozen bubbles to trigger the appearance of a chest containing the M stamp.

14. N Stamp
- Location: Forest Temple
You can easily locate the N stamp after freeing the last of the monkies in the Forest Temple. Having used your Boomerang to spin the two wind turbines to open the monkey’s cage, start walking back along the wooden platform you used to reach the cage and quickly turn right. You’ll spot the chest containing the N stamp on a wooden platform.

15. O Stamp
- Location: Kakariko Gorge
Head to the bridge at Kakariko Villiage. Once there, go directly in the southeast direction until you come across the opening to another Lantern Cavern. Having traveled to the end of the long tunnel and fought a large sider, you’ll be able to take the O stamp from a chest at a dead end.

16. P Stamp
- Location: Lanayru Province
You will locate the P stamp at another dig spot in North Hryule. Reach the stone bridge that crosses over the river; cross (or stay) on the left side of the river and follow it to its end in the northwest direction. Just before the dark tunnel, you’ll find a dig spot.
Dig down, and you’ll be greeted by some fenced-off Skulltula. Smash through the fences and defeat the enemies — you’ll then easily spot three unlit torches you must re-light to cause the P Stamp chest to appear.

17. Q Stamp
- Location: Snowpeak Ruins
Head to the Snowpeak Ruins mansion’s entrance and survey the ornamental armor lining the walls there. Take a look at the middle one on the left row, and you’ll spot an alcove behind it.
Use the Ball & Chain swinging it straight at the suit of armor to break it, revealing the chest holding the Q stamp.

18. R Stamp
- Location: Gurudo Dessert
Head to the furthest western point of the Guerudo Desert to find a large chasm dividing two pieces of land. Once you get close, you’ll spot a Peahat flying high above, heading towards you.
Use the Hookshot to grapple onto it and fly to the other side. You’ll then clearly spot the chest containing the R stamp on a shallow platform close to the edge.

19. S Stamp
- Location: Lake Hylia
Head to the central rockface at the southernmost point of Lake Hylia. Make your way up and climb the ladder to the top, where you’ll find the entrance to the Lantern Cavern in this area. Directly in front of this entrance, there’s a dig spot: having dropped down, you’ll need to fight several Toadpolis to get the chest with the S stamp to materialize.

20. T Stamp
- Location: Temple of Time
Head to 7F in the Temple of Time and then to the large scales in the center of the room. Stepping on the scales will cause the platform to drop where you stand, so lift the weight and throw it onto the other side to rebalance it.
You’ll then be at the ideal vantage point to fire your hookshot at a grapple point mounted on the ceiling above the giant bell in the center of the room.
Having dropped down from the Hookshot grapple, use the spinner to traverse the rail to the right and end up on a platform above the main floor. Follow it around to reach Stamp T’s chest.

21. U Stamp
- Location: Goron Mines
Reach the large outdoor area in Goron Mines in the north part of the map (the largest ‘room’ on the map). Head to the northeast-most point of the area where you’ll find the entrance to an adjoining room.
Turn left at this entrance and look upwards to find some red netting you can use the Hookshot to grapple onto. From here, climb to the top of the ledge to find the chest containing the U stamp.

22. V Stamp
- Location: Lanayru Province
Coming straight down the stairs from Hyrule Castle, turn directly right to find a huge hole in the ground with a Hookshot point on the wall.
Upon grappling on and looking around, you’ll see several more points below you spaced out on the rock face. Grapple from point to point until you reach what is virtually the bottom of the pit. The last grapple point will bring you to a ledge with a chest holding the V stamp.

23. W Stamp
- Location: Lake Hylia
Reach the Lake Hylia Twilight Portal (the north portion of the map). Just south of where you exist in the portal, you’ll locate a jumpable ledge with a body of water under it. Dive into the water between the jump gap to find the W Stamp chest.

24. X Stamp
- Location: Sacred Grove
Head to the Sacred Grove, and rather than going through the main gates, take a left to find some broken rocks leading to a new area.
Upon entering, you’ll see some vines directly ahead of you. Climb these to the top, and then use the Spinner to grind a rail to your right and reach the chest.

25. Y Stamp
- Location: Lakebed Temple
Within Lakebed Temple, head to the first water slide where you’ll find a lollipop-shaped body of water. Use the Iron Boots to climb back up the slide.
Progress right up to the top, turn the corner, and use the Hookshot on the grapple point directly infront and above. Once you drop down, you’ll find a chest with the Y Stamp inside.

26. Z Stamp
- Location: City in the Sky
For the last letter, head to the main central area of the outdoor area of the dungeon—the bit with the thick cylindrical pillar connected to several other platforms via tightropes. Go to the northwest side of the map, and you’ll notice some vines that you can use your Hookshot on.
Climb the vines to the platform above, switch the wolf form, and walk the tightrope ahead to the central structure. Then, make your way to the right and use your hookshot again to grapple onto the vines above and in front of you, bringing you to a higher level.
At this point, you’ll spot the Z Stamp chest ahead of you; simply traverse the last two tightropes to claim your reward.

Characters and Icons
27. Zelda (Happy) Stamp
- Location: Hyrule Castle
To collect the Zelda (Happy) Stamp, make your way to the large throne room doors and then head left to find another door requiring a small key.
In this new room, you’ll find five chests lining the left wall; the second one contains the Stamp.

28. Zelda (Angry) Stamp
- Location: Cave of Ordeals
Head to the Cave or Ordeals where you meet the Great Fairy on floor 20, and you’ll find the chest containing the Zelda (Angry) Stamp to the east of the map next to the automatic stone door.

29. Zelda (Sad) Stamp
- Location: Hyrule Castle
To find the Zelda (Sad) Stamp, you’ll need to go back to the room where you found the Hyrule Castle map and climb the ladder on the wall.
Once you reach the walkway above, simply follow it around to find the chest at the end.

30. Zelda (Surprised) Stamp
- Location: Lanayru Province
You’ll likely have already spotted the chest containing the Zelda (Surprised) Stamp at the center of Hyrule Castle’s fountain, but can’t find a way to reach it.
Standing at the start of the stairs in front of the Hyrule Castle main gates, look up at the turret on the left to find a Hookshot grapple point. Having reached the turret walkway, use the spinner to grind along the middle rail and then jump off to reach the fountain where the chest is located. This might take a few attempts to get down.

31. Piece of Heart Stamp
- Location: Eldin Province
Reach the Bridge of Eldin and turn left to look at a long rock ridge. You’ll notice that on the cliff face, there’s a Hookshot grapple point you can use to reach the ridge.
Having gotten up here, follow it around to reach a lava cave. Once inside, you’ll need a well-timed jump: stand specifically at the area below (close to the entrance) and jump straight off the edge to land in a magnetic stream. The chest containing the Piece of Heart Stamp will be waiting for you once you exit the stream.

32. Fairy Stamp
- Location: Cave of Ordeals
It’s unlikely you missed this stamp having already played through the Cave of Ordeals; the chest is located right in front of you on level 50 before you make the jump to the Great Fairy location.

33. Zant Stamp
- Location: Palace of Twilight
Just before you get to the second sol at the Palace of Twilight, you’ll find yourself in a large, square room engulfed in Dark Fog. You’ll remember you needed to use the Double Hookshot to traverse the room, and this is also how you’ll find the Zant stamp.
Hookshot up to the ceiling rafters as you usually would, and then to the first of the deep alcoves on the right side of the room, which contains the chest with the Zant Stamp.

34. Agitha Stamp
- Location: Hyrule Town Castle
Collecting this stamp is a little more involved. You’ll find Agitha in Agitha’s Castle in Hyrule Castle Town. Agitha’s stamp is received after completing the side quest involving bringing her 12 golden bugs—special insects located all over Hyrule (you can check out this zelda.net page for each location if you haven’t already found them).
There are actually 24 bugs in total because there are both male and female varieties to collect, but you only need one from each pair for the stamp.
With the bugs in your inventory, give them to Agitha to receive the Agitha Stamp.

35. Cuccoo Stamp
- Location: Lake Hylia
At the furthest point of Lake Hylia, you’ll have the opportunity to play a mini-game called Falbi’s Flight by Fowl by speaking to the man himself.
The game consists of using a Cuccoo to fly through giant wireframe Rupees to earn money, but rather than playing normally, pick up a Cuccoo and float to the tiered, square wooden island located on the left of the map.
You’ll find a different chest on each of the spinning tiers; the third one down from the top contains the Cuccoo Stamp.

36. Malo Mart Stamp
- Location: Malo Mart (Hyrule Castle Town)
Travel to Hyrule Castle Town and go to the Malo Mart (the very first store on your right as you enter Hyrule Castle Town). You’ll need to complete the Malo Mart & Magic Armour Quest (Here’s a great guide from back in the day by SealisMealis on Game FAQs)
Having done so, all you need to do is buy the stamp from the shop for 100 rupees.

37. Link (Happy) Stamp
- Location: Ordon Ranch
Head inside the barn at Ordon Ranch to find a dig spot. Having tunneled down, light the three torches to reveal the chest containing the Link (Happy) Stamp.

38. Link (Sad) Stamp
- Location: Eldin Province
Go to Eldin Bridge and proceed out of the south exit to find a dig spot to your right. Dig down and swim across the small body of water to reach the chest with the Link (Sad) Stamp inside.

39. Link (Angry) Stamp
- Location: Lanayru Province
Head directly west from the entrance of Hyrule Castle to find some vines you can Hookshot onto (they’re found just before you head back onto the dirt track out of this area).
Climb up the vines and onto a ledge, and you’ll see another dig spot. Deal with a couple of enemies inside the chamber to reveal the chest containing the Link (Angry) Stamp.

40. Link (Surprised) Stamp
- Location: Cave of Ordeals
On floor 10 of the Cave of Ordeals, you’ll find the Link (Surprised) Stamp chest next to the automatic stone door, just like with the Link (Angry) Stamp.

41. Link (Wolf) Stamp
- Location: Faron Province
The Link (Wolf) Stamp can be found close by the east entrance to Faron Province. Once you enter the area, head to the northmost point of the map to find another dig spot in between two patches of grass. The underground area below contains the Stamp’s chest.

42. Minda (Happy) Stamp
- Location: Cave of Ideals
The Minda (Happy) Stamp is another one located next to one of the automatic stone doors within the Cave of Ideas; this time it’s located on floor 30.

43. Minda (Sad) Stamp
- Location: Gerudo Desert
Head to the center of the Gerudo Desert and then north until you find a raised level with a tree on top, and use your Hookshot on the tree to reach its surface.
You’ll then locate three skulls on the ground, marking a dig point. Digging down, you’ll then find yourself encircled by large boulders. Use the Ball & Chain to smash the ones directly in front of you to reveal an opening into the room, and then light three torches at the right, left, and center to reveal the Minda (Sad) Stamp chest.

44. Minda (Angry) Stamp
- Location: Palace of Twilight
In the second room of the Palace of Twilight, you’ll notice a second floor only accessible by using the Double Hookshot.
Hookshot to the nearest grapple point and then onto the ceiling point to drop down onto this floor. The Minda (Angry) Stamp can then be found in a chest directly ahead of you.

45. Minda (Surprised) Stamp
- Location: Abiter’s Ground
In the chamber west of the central area of Abiter’s Ground, you’ll be required to pull a chain on the right side of the room by using your wolf form. Do so, and then walk underneath where the chandelier was to reach the chest containing the Minda (surprised) stamp.

46. Rupee Stamp
- Location: Hyrule Castle Town
Obtaining the Rupee Stamp requires the player to collect all 60 Poe Souls and speak to the cat at his house (accessed via a dig spot at the east of the map in the area denoted by a small square). If you haven’t found the required Poe Souls yet, this guide by Rocko’s Walkthroughs can help you.
Having completed the side quest, the cat will give you 200 rupees as well as the Rupee Stamp.

47. Ooccoo Stamp
- Location: City in the Sky
You’ll likely remember the dilapidated structure behind the destroyed bridge in the city in the Sky area, but you may not have had the Double Hookshot at this point. Now that you do, head back here and shoot the first Hookshot Grapple point you see.
From here, simply progress through the Hookshot platforming challenge to reach a chest with the Ooccoo Stamp at the end as your reward.

48. Heart Container Stamp
- Location: Cave of Ordeals
The Heart Container Stamp is yet another item located next to one of the stone doors in the Cave of Ordeals. This time, it’s on floor 40.

49. Treasure Chest Stamp
- Location: Lake Hylia
Like the J stamp, the Treasure Chest stamp is also located in the Lantern Cavern of Lake Hylia. Near the end of the cavern, you’ll come across a dead end with a large boulder blocking an alcove. Blow it up with a bomb to reveal the Treasure Chest Stamp’s chest behind it.

50. True Minda Stamp
- Location: N/A
There is no location for this Stamp, as you will receive it automatically if you have collected all 49 other Stamps.
FAQs
Question: Are stamps available as collectibles in the original version of the game?
Answer: No. Stamps were part of the small number of new features added to the Wii U version of the game. The chests can still be found at the locations above in the Gamecube and Wii versions, though. Instead of containing Stamps, they’ll offer you rupees for your efforts.
Question: That’s a lot of stamps. Is it worth the effort to collect them all?
Answer: Whether or not it’s worth it to collect all the stamps is subjective and depends on the individual player’s goals and preferences. On one hand, collecting all 50 stamps is a challenging and rewarding feat that requires players to explore every nook and cranny of the game’s world and master various challenges and boss battles. On the other, it takes a huge amount of time.
Question: If a Twilight Princess remake comes to Switch, do you think we’ll get more stamps?
Answer: It’s hard to say, but I’d wager Nintendo would add different types of collectibles in place of Stamps, as the Stamps are pretty specific to the Wii U.
Twilight Princess Stamp Locations: Wrapping up
I hope this article has provided you with everything you need to find each Stamp in Twilight Princess HD. For more on Twilight Princess in general, be sure to check out our other articles such as our Twilight Princess: Game Overview or our Hero’s Shade Guide.